Our Roofing Process: How We Replace Your Roof from Start to Finish
The Fraser Roofing Ltd. method, explained step by step so you know exactly what to expect
Last updated: February 2026
Why We Built a Process You Can Trust
Before Kory and Johnny Peters started Fraser Roofing Ltd. in 2026, they spent years as Red Seal Boilermakers in the Alberta oil sands. In that world, sloppy work does not just cost money. It shuts down production, puts people in the hospital, or worse. Every weld gets inspected. Every procedure has a checklist. Every crew member is accountable.
When they brought that discipline home to Agassiz, BC, they applied the same mindset to residential roofing. Over 500 roofs later, the process below is not theoretical. It is the actual sequence of events that happens on every job, whether it is a small bungalow in Harrison Hot Springs or a large family home in Chilliwack.
We are sharing it here so you know exactly what to expect. No surprises. No hidden steps. No corners cut.
Phase 1: Before We Touch Your Roof
The First Phone Call
When you call (778) 860-4747, you talk to Kory or Johnny directly. Not a dispatcher, not a call centre. We ask about your roof's age, any visible issues, and your timeline. If it sounds like a project we can help with, we schedule an on-site visit, usually within a few days.
On-Site Inspection and Estimate
One of us comes to your property, walks the roof where safe to do so, and takes measurements. We check the pitch, count the layers, look at the condition of the flashing, and note anything that might affect the scope of work. We also check the attic from inside if accessible, looking for signs of moisture, daylight through the decking, or ventilation problems.
Within a day or two, you get a written estimate that breaks out materials and labour separately. We list the shingle brand and product line, the underlayment type, the ice and water shield coverage, and the nail pattern we will use. If we think you might need decking repairs, we give you a per-sheet price so there are no surprises when the old shingles come off.
Material Selection
We walk you through shingle options based on your budget, the look you want, and what performs best in the Fraser Valley climate. We source materials from local suppliers like Roofmart in Chilliwack and Abbotsford, which means shorter lead times and we can get replacements fast if we need additional material on site.
Once you approve the estimate and select your materials, we lock in a start date and order everything. Materials get delivered to your property the day before or morning of the job.
Phase 2: Job Site Staging
This is where the oil field training shows up most clearly. In industrial work, you do not start turning wrenches until the job site is organized, safety gear is checked, and everyone knows the plan. We treat your front yard the same way.
Staging Area Setup
- Dumpster positioning -- placed as close to the house as possible to shorten the debris path, with plywood underneath to protect the driveway
- Tarp deployment -- heavy canvas tarps around the full perimeter of the house to catch falling debris, granules, and nails before they hit your garden beds or lawn
- Ground protection -- plywood covers over AC units, window wells, and any ground-level features that could be damaged by falling material
- Debris chute -- if the roof-to-dumpster distance allows it, we set up a chute so torn-off shingles go straight into the bin instead of falling loose
Safety Setup
Safety Is Not Optional
Falls from roofs are the leading cause of death in residential construction. We treat fall protection the same way oil field crews treat confined space entry: no shortcuts, no exceptions.
- Roof anchors installed before anyone steps onto the deck
- Full-body harnesses with shock-absorbing lanyards for every person on the roof
- Ladder inspection at the start of every day -- feet, locks, rungs, and extension clips
- Exclusion zone roped off below the eaves so nobody walks under falling debris
- Morning safety briefing -- weather, hazards, plan for the day
What We Ask You to Do Before We Arrive
- Move vehicles out of the driveway to make room for the dumpster and material delivery
- Take down anything hanging on interior walls near the work area (the hammering vibration will knock things loose)
- Cover or remove items stored in the attic (dust and small debris can fall through during tear-off)
- Make arrangements for pets (the noise is loud and unfamiliar, and the exclusion zone around the house needs to stay clear)
- Let your neighbours know there will be noise and truck activity for a few days

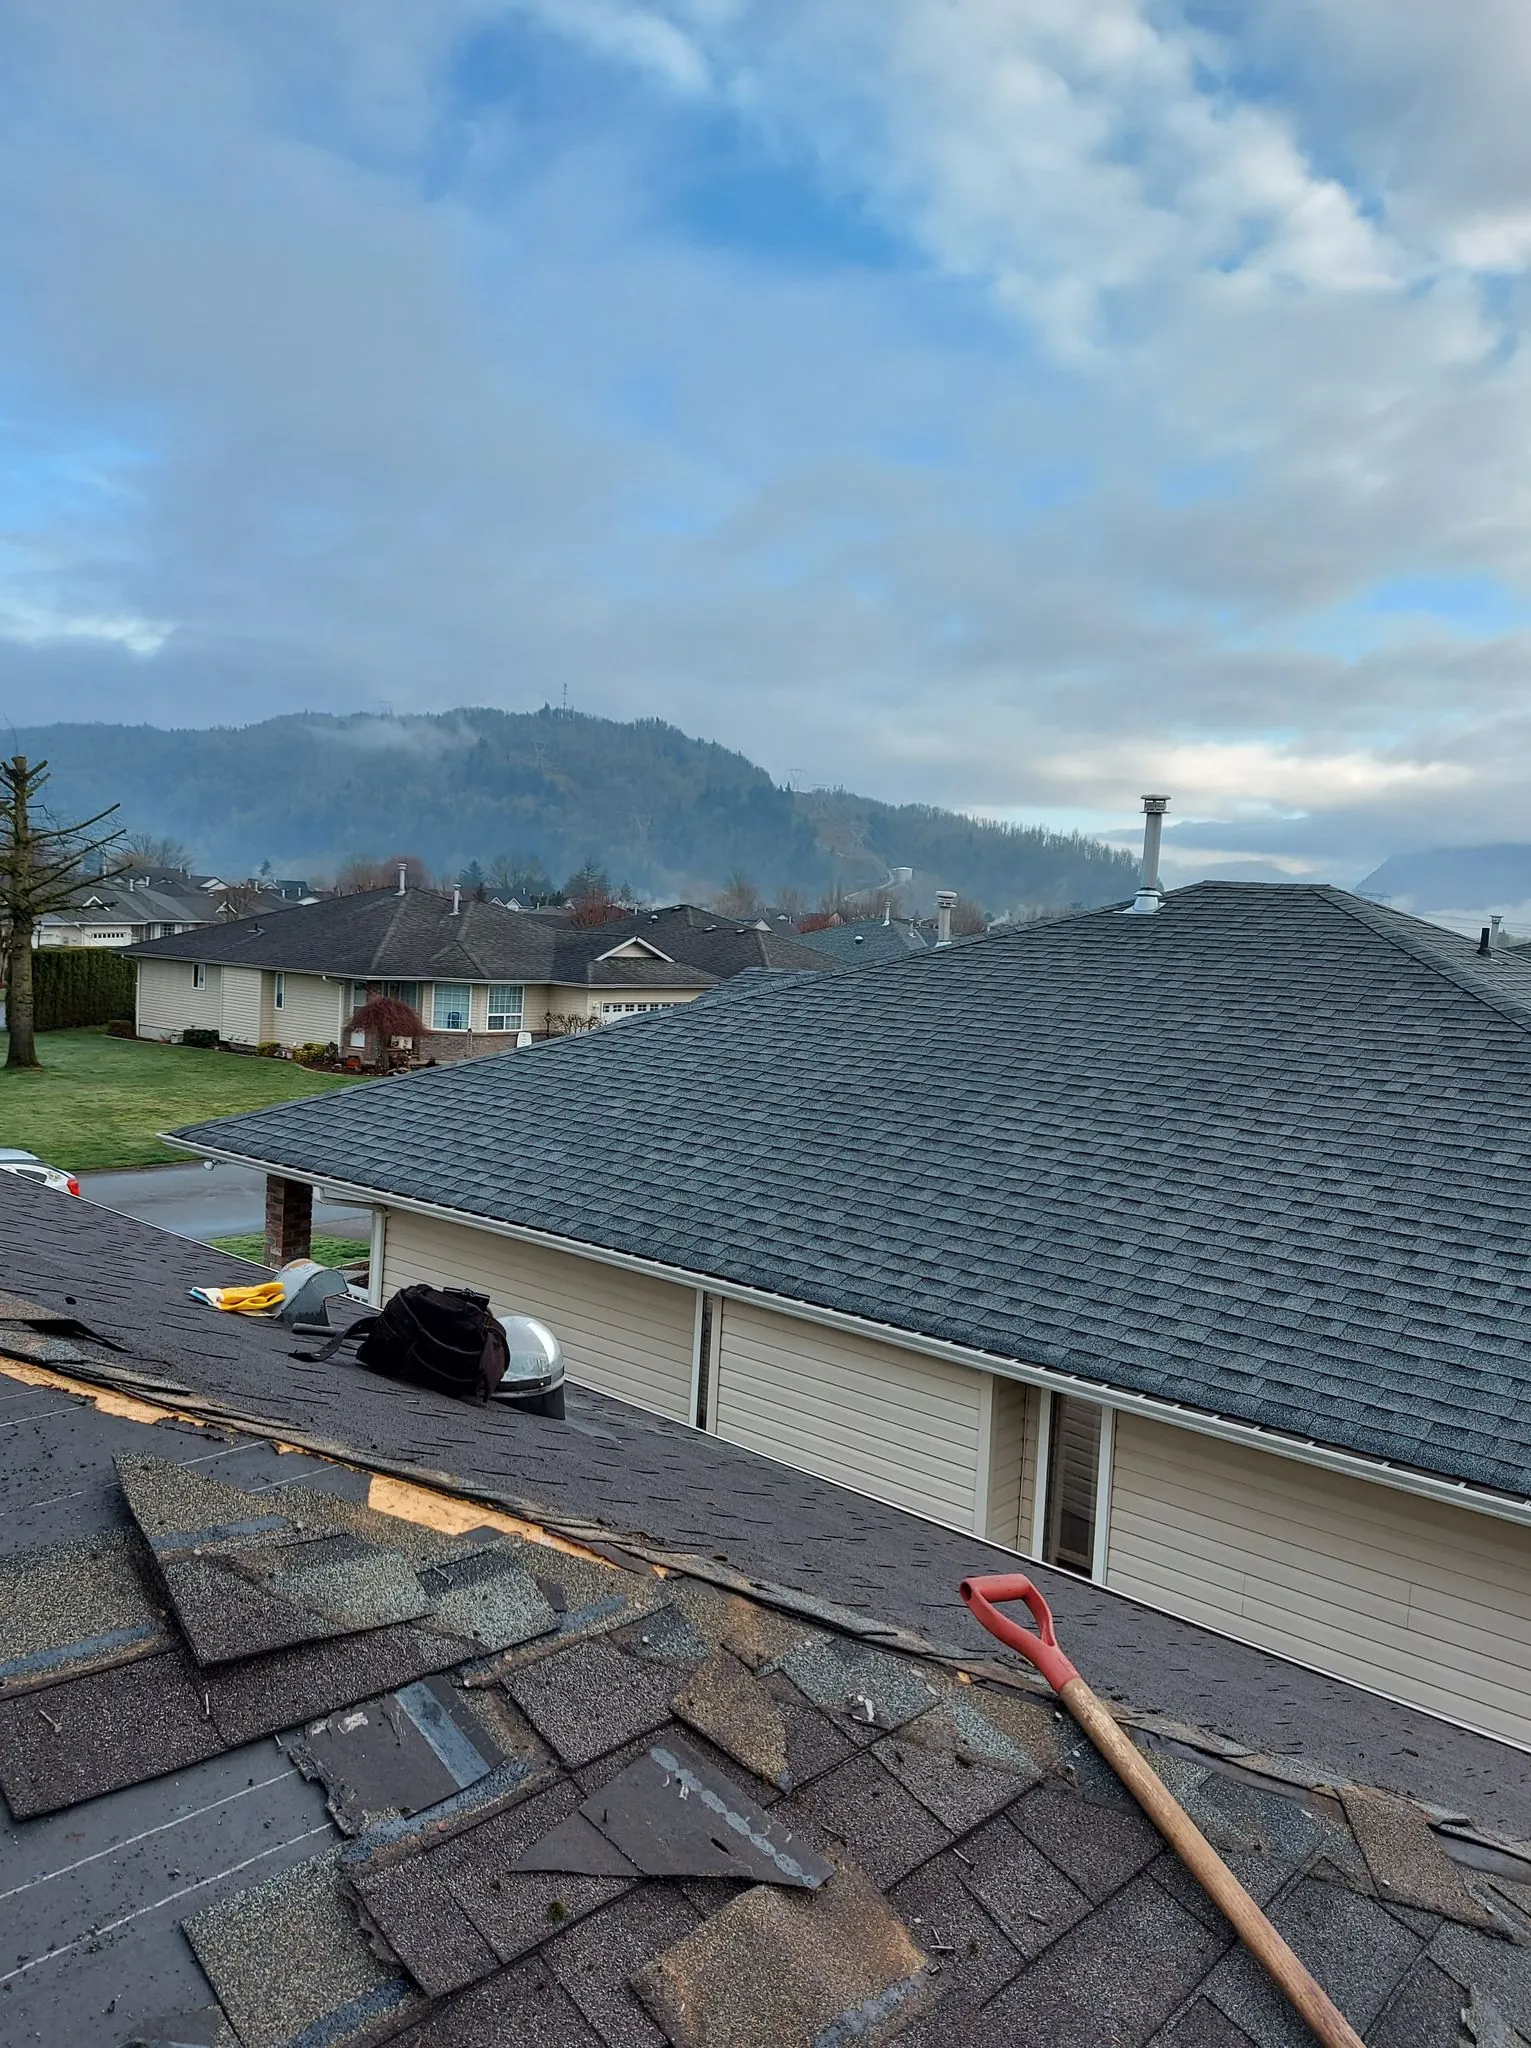
Phase 3: Tear-Off
Tear-off is the loudest, messiest, and most physically demanding part of the job. It is also where many contractors rush and leave problems hidden under the new roof. We do not rush.
How We Strip a Roof
- Start at the ridge, work down -- shingles overlap downward, so removing from the top lets each course release cleanly
- Remove everything -- old shingles, old underlayment, old flashing, old drip edge, and every single nail. We strip to bare wood
- Work in controlled sections -- we never expose more decking than we can cover with underlayment the same day. If rain threatens, we tarp immediately
- Debris goes straight to the dumpster -- we do not let torn-off material pile up on the roof. Piles create tripping hazards and add unnecessary weight to the structure
The Nail Pull
This is one of the most tedious steps and one of the most important. Every protruding nail left in the decking is a puncture waiting to happen when the new underlayment goes down. We pull every nail we can grab with a cat's paw and pound flat anything that will not come out. Then we sweep the deck clean.
Contractors who skip this step or do it halfway cause callbacks within the first year. A nail head poking through the underlayment creates a tiny hole. Water finds tiny holes. The homeowner does not notice until the ceiling stain appears months later.
Phase 4: Deck Inspection and Repair
With the old roof stripped away, we can see the condition of the plywood or OSB decking underneath. This is the moment of truth that no one can predict from the outside.
What We Look For
- Soft spots -- we walk the entire deck and press with our feet. If it gives, the wood is compromised
- Delamination -- OSB that has absorbed moisture will swell and separate into layers. It loses all structural strength
- Water staining -- dark rings or discoloration on the underside (visible from the attic) tell us where past leaks occurred
- Sagging between rafters -- indicates either undersized decking or a structural issue that needs attention
How We Handle Repairs
If we find damaged decking, we do three things before we cut anything:
- Photograph it and send the photos to you right away
- Explain the scope -- how many sheets need replacing and why
- Get your approval -- we do not add charges without your say-so
The repair itself is straightforward: cut out the damaged section to the nearest rafter, install matching-thickness plywood, nail it down on 6-inch centres, and leave a 1/8-inch expansion gap between sheets. Most homes need zero to three sheets replaced. We carry spare plywood on every job so this does not delay the project.
Phase 5: Waterproofing Layers
This is where long-term performance is decided. The shingles you see from the street are the first line of defence against rain, but they are not what keeps water out of your home. That job belongs to the layers underneath.
Eave Drip Edge (Goes on First)
Metal drip edge along the eaves directs water into the gutters instead of letting it wick back under the roofing. We install this first because the ice and water shield and underlayment need to lap over it.
Ice and Water Shield
This self-adhering membrane is the most important waterproofing component on the roof. It seals around nail penetrations, which means even if wind-driven rain gets under the shingles, the membrane stops it.
Our Standard Exceeds Code
BC Building Code requires 36 inches of ice and water shield at the eaves. We install a minimum of 72 inches on every roof. The Fraser Valley gets ice dams, wind-driven rain, and heavy snow loads depending on elevation. Doubling the eave coverage costs an extra $150 to $300 on a typical home and eliminates the most common source of attic water damage. It is not even a close call.
We also run ice and water shield the full length of every valley (36 inches wide minimum) and wrap it around every penetration -- pipe boots, vents, skylights, and chimneys.
Synthetic Underlayment
We use synthetic underlayment on every job. Never felt paper. The reasons are not complicated:
- Synthetic is waterproof on its own. Felt absorbs moisture and becomes a liability if exposed to rain during installation
- Synthetic does not tear when you walk on it. Felt tears easily, especially in hot weather
- Synthetic lasts the full life of the shingles (30+ years). Felt degrades in 5 to 10 years under the shingles
- Synthetic lies flat and stays flat. Felt wrinkles when it gets wet, creating ridges under the shingles that show through over time
We roll it horizontally from eave to ridge, overlapping each course by 6 inches, and fasten with cap nails every 12 inches along seams. When we reach the ridge, we lap over the peak by 6 inches so both sides are tied together.
Rake Drip Edge (Goes on After Underlayment)
The order matters. Eave drip edge goes under the underlayment. Rake drip edge goes over it. This ensures that water hitting the underlayment flows down onto the eave drip edge and into the gutter rather than running behind the metal.
End-of-Day Weatherproofing
If we cannot finish shingling in a single day, we make sure every square inch of decking is covered before we leave. Underlayment on, seams lapped, edges secured. If any section is still in progress, we tarp it with weighted poly. Your home stays dry overnight no matter what the weather does.

Phase 6: Shingle Installation
Valley Flashing
We use the open valley method on every roof. A 24 to 36 inch wide piece of metal flashing sits centred in the valley, and the shingles are cut back 2 to 3 inches from the centreline on each side. Open valleys shed water faster than closed valleys, they are easier to inspect and maintain, and they last longer. Closed-cut valleys look clean from the ground but trap debris and are harder to repair.
Starter Strip and Chalk Lines
The starter strip runs along the eaves and rakes, providing a continuous adhesive seal under the first course of shingles. Without it, the first row can lift in wind.
We snap chalk lines across the roof every two to three courses. These keep the shingle rows straight over the full run of the roof. On a long roof face, even a tiny drift per course adds up to a visibly crooked line by the time you reach the ridge. Chalk lines prevent that.
Field Shingle Nailing: The 6-Nail Standard
6 Nails Per Shingle, Every Shingle
Code requires 4 nails. Most manufacturers require 6 nails for their enhanced wind warranty. The Fraser Valley gets strong outflow winds from the Coast Mountains that can exceed 100 km/h. Six nails nearly doubles the wind uplift resistance compared to four. We have never had a shingle blow off a roof we installed. That is not luck. That is six nails.
Each nail is placed just below the adhesive strip and 1 inch from the edges. We set the compressor pressure so nails sit flush with the shingle surface -- not over-driven (which cracks the shingle and loses holding power) and not under-driven (which creates a bump under the next course). Getting this right requires checking pressure every morning as temperature changes affect how the nailer behaves.
Course-by-Course Installation
The first full course lines up with the chalk line and overhangs the drip edge by 1/2 to 3/4 of an inch. Each subsequent course is offset by at least 6 inches from the one below so that the joints never stack vertically. We maintain a consistent 5-5/8 inch exposure for architectural shingles, checking against the chalk lines regularly.
At valleys, we cut each shingle along the chalk line, clip the top corner at 45 degrees to direct water flow away from the joint, and seal the cut edge with roofing cement. At rakes, we trim to a clean overhang past the drip edge.
Penetration Flashing
Every hole in the roof is a potential leak. Pipe boots, exhaust vents, and other penetrations each get sealed according to the same principle: the flashing base slides under the shingles above and sits over the shingles below, so water always flows over the flashing rather than under it.
- Plumbing vents -- rubber-gasket pipe boots slid over the pipe, base nailed to the deck, upper and side flanges shingled over, lower flange exposed
- Exhaust vents -- positioned over the deck opening, nailed through the flange, shingled over the top and sides
- Chimneys -- base flashing at the bottom, step flashing woven into each course along the sides, counter flashing embedded in the mortar, and a cricket on the upslope side if the chimney is wider than 30 inches
Phase 7: Ridge Cap and Final Sealing
Ridge cap shingles are the finishing touch on the roofline. We start at the end opposite the prevailing wind direction so that the wind blows over the laps rather than under them. Each cap overlaps the previous one by 5 to 6 inches and gets two nails, one on each side. The final cap gets a dab of roofing cement underneath for extra hold.
If the home has a ridge vent, we install it before the caps. Ridge vents allow hot air to exhaust from the attic, which reduces moisture buildup and extends shingle life. We cut the opening, install the vent profile, and cap over it so it is invisible from the ground but fully functional.
Phase 8: Quality Inspection
Before we call the job done, Kory or Johnny walks the entire roof one more time. This is not a quick glance. It is a systematic check:
- Every nail pattern confirmed (no high nails, no visible nail heads)
- Every flashing seal inspected for complete coverage
- Every valley cut checked for straightness and proper cement seal
- Every course checked against the chalk lines for alignment
- Ridge caps confirmed secure with proper overlap direction
- No exposed underlayment, no lifted edges, no missed sealant
In the oil field, this is called a quality hold point. You do not move to the next step until the current step passes inspection. We apply the same standard here. If something is not right, we fix it before we come down.
Phase 9: Cleanup and Final Walkthrough
The Cleanup That Matters
A roof replacement generates thousands of nails. They end up in the lawn, the driveway, the garden beds, and places you would never expect. A nail in a tire is a $200 problem. A nail in a bare foot is a trip to the emergency room.
- Roof sweep -- blow or sweep all granules, cutoffs, and packaging off the roof surface
- Gutter cleanout -- remove all debris and granules from gutters and downspout openings
- Ground tarps -- shake out and fold, collecting all captured debris
- Magnetic sweeps -- we run a rolling magnet across the entire property at least three times: driveway, walkways, lawn, and garden beds. We do this on hands and knees around the foundation if needed
- Dumpster haul-away -- scheduled for pickup the same day or next morning
The Final Walkthrough
We walk the property with you and point out everything we did. You see the finished roof from the ground, and we show you photos from up top so you can see the detail work on the flashing, valleys, and ridge. If there were any decking repairs, we show you the before and after photos.
We answer every question. We explain the warranty coverage. We give you our direct phone number (the same one you called at the start) and tell you to call any time if you have a concern. We are in Agassiz. We are not going anywhere.
What Makes This Process Different
There is nothing proprietary about the steps above. Any competent roofer follows a similar sequence. What separates a good roof from a bad roof is not the order of operations. It is whether each step actually gets done properly or gets skipped because the crew is in a rush to move on to the next job.
- We pull every nail during tear-off. Some crews leave dozens of them sticking up and just lay the new underlayment over the top
- We inspect every square foot of decking. Some crews glance at it and only fix the spots where their foot goes through
- We install double the code-required ice and water shield. Some crews install the bare minimum or skip it in areas that "probably" will not have problems
- We use 6 nails per shingle. Some crews use 4 because it is faster
- We run the magnetic sweeper three or more times. Some crews run it once, or not at all
Each of these details takes a small amount of extra time. Together, they add up to a roof that performs for decades instead of developing problems within a few years.
Kory and Johnny build every roof like their own family lives under it. Because in this community, they probably know the family that does.
Frequently Asked Questions
How long does a full roof replacement take?
Most residential roofs in the Fraser Valley take 2 to 3 days from tear-off to final cleanup. Larger homes, steep pitches, or decking repairs can extend the timeline by a day. We always provide a realistic schedule before we start.
What happens if it rains during the job?
We will not begin tear-off unless the forecast is clear enough to get the roof weathertight. If weather moves in unexpectedly, we tarp every exposed section immediately. Completed sections are already protected by synthetic underlayment.
Do I need to be home?
No. We coordinate access, gate codes, and pet arrangements ahead of time. We will call you if we find anything unexpected that needs your approval, like damaged decking.
Why 6 nails instead of 4?
The Fraser Valley gets strong outflow winds. Six nails nearly doubles wind uplift resistance and is required by most manufacturers for enhanced wind warranty coverage. We use 6 nails on every roof because it is the right thing to do.
How will I know if my deck needs repairs?
You will not know until the old shingles come off. We inspect every square foot, photograph any damage, explain the scope, and get your approval before replacing any sheets.
Need Expert Help With Your Roof?
Kory & Johnny have completed 500+ roofs across the Fraser Valley since 2026. Free inspections, honest estimates, no pressure.
(778) 860-4747Serving Hope, Agassiz, Chilliwack, Rosedale, Abbotsford & the entire Fraser Valley
Ready to see this process in action on your own home? Call (778) 860-4747 for a free on-site estimate. Serving Agassiz, Chilliwack, Harrison, Hope, Abbotsford, Mission, Rosedale, and the entire Fraser Valley.