Roof Leak Detection & Repair: Lessons from ten years of Fraser Valley Roofs
How Kory & Johnny Peters Track Down Leaks That Other Roofers Miss
Last updated: February 2026
Why the Fraser Valley Is BC's Toughest Environment for Roof Leaks
Living between Hope and Abbotsford means your roof absorbs more punishment than almost anywhere else in British Columbia. Over 170 cm of annual rainfall, atmospheric rivers that dump 100+ mm in 48 hours, freeze-thaw cycles in the eastern valley, and persistent fog that keeps surfaces damp for weeks, this is what your roof fights every single day.
With roofing experience across ten years of roofs in the Fraser Valley, Kory Peters and Johnny Peters have inspected and repaired leaks in every climate condition. Both Red Seal Journeyman Boilermakers with oil sands experience, they bring industrial-grade precision to residential leak detection. That background matters: when you've welded pressure vessels that cannot leak, you develop an eye for water intrusion that most roofers simply don't have.
This guide shares what those ten years of roofs have taught us about finding leaks, understanding why they happen in our specific climate, and making repairs that last through Fraser Valley winters.
How We Trace a Leak: The Three-Stage Method
The single biggest mistake homeowners make is assuming the ceiling stain marks the leak location. It almost never does. Water enters at one point on the roof, travels along rafters, runs down sheathing, and may drip onto your ceiling 5-10 feet away from where it actually got in. Here's how we find the real source:
Stage 1: Attic Investigation
If possible, get into your attic during or immediately after rain. Bring a strong flashlight and look for:
- Active water trails: follow the wet path upward along rafters and sheathing toward the entry point
- Dark stains on wood: old water paths that show recurring leak patterns
- Wet or compressed insulation: indicates the leak zone is directly above
- Daylight through the deck: visible gaps mean water entry points
- Mold or fungal growth: signals chronic moisture, not just a one-time event
Safety note: Step only on rafters or joists, never on insulation or drywall. A wet attic is slippery and dangerous. If you can't safely access or navigate your attic, call us at 604-728-0146 and we'll do the inspection for free.
Stage 2: Measurement Transfer
Once you've found the entry point in the attic, measure its distance from two fixed reference points, the chimney, a vent stack, or an exterior wall. Then transfer those measurements to the roof exterior. This triangulation method is how professionals locate the exact area to inspect, and it prevents wasted time examining the wrong section of roof.
Stage 3: Exterior Confirmation
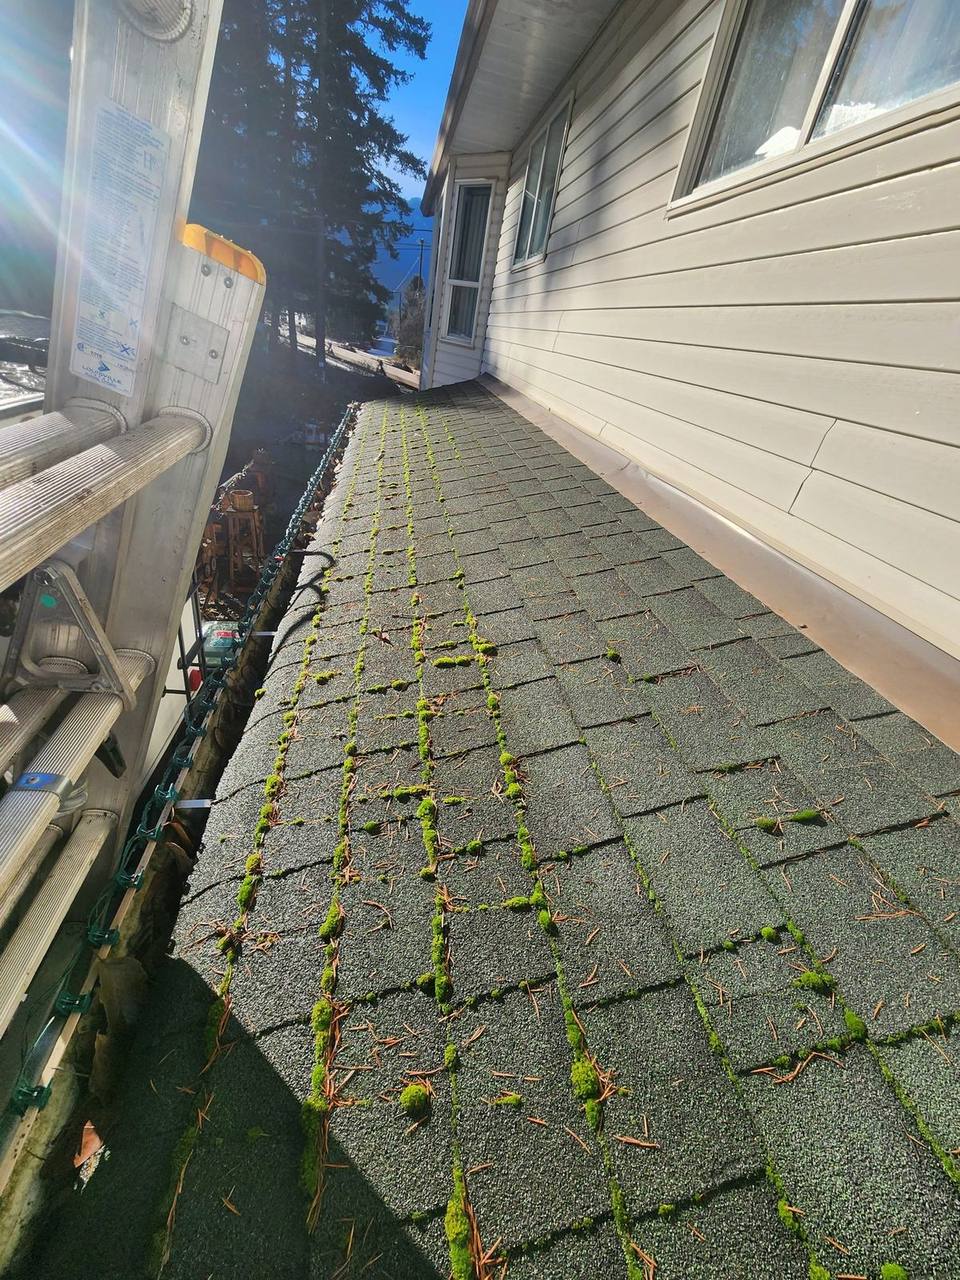
At the corresponding exterior location, we look for the telltale signs: cracked or separated flashing, lifted shingle tabs, deteriorated vent boots, corroded valley metal, or failed sealant around penetrations. In the Fraser Valley, moss damage is a frequent culprit that other regions rarely deal with, moss roots grip shingle granules and gradually pry edges upward, creating entry channels for rain.
The 6 Most Common Leak Sources on Fraser Valley Roofs
After ten years of inspections, these are the leak sources we encounter most often, ranked by frequency in our service area:
1. Valley Flashing Failures
Valleys are where two roof planes meet, funneling enormous volumes of water into a concentrated channel. In the Fraser Valley's heavy rainfall, valleys handle more water per square foot than any other roof component. Over time, the galvanized metal corrodes, seams separate, and debris accumulates, creating dams that force water sideways under shingles.
- Warning signs: Rust stains on valley flashing, visible seam gaps, granule buildup in the valley channel, water stains in attic along the valley line
- Temporary fix: Roof sealant along corroded seams ($50-100 DIY)
- Permanent fix: Full valley flashing replacement ($500-1,500 per valley)
- Fraser Valley note: We see valley flashing fail 3-5 years sooner here than provincial averages due to our rainfall volume
2. Chimney Flashing Deterioration
Chimneys penetrate the roof plane and create a complex intersection of materials, brick, mortar, metal flashing, sealant, and shingles. Every one of those materials expands and contracts at a different rate through our wet-cold-warm cycles, which is why chimney flashing fails predictably in our climate.
- Warning signs: Gaps between counter-flashing and chimney face, crumbling mortar crown, water stains on attic framing near chimney
- Temporary fix: Re-seal with polyurethane caulk ($100-200)
- Permanent fix: Full chimney re-flash with step flashing and counter-flashing ($800-2,000)
- Add a cricket: If your chimney is wider than 30 inches, a cricket (diverter) prevents water pooling behind it ($1,500-3,000)
3. Vent Boot Cracking
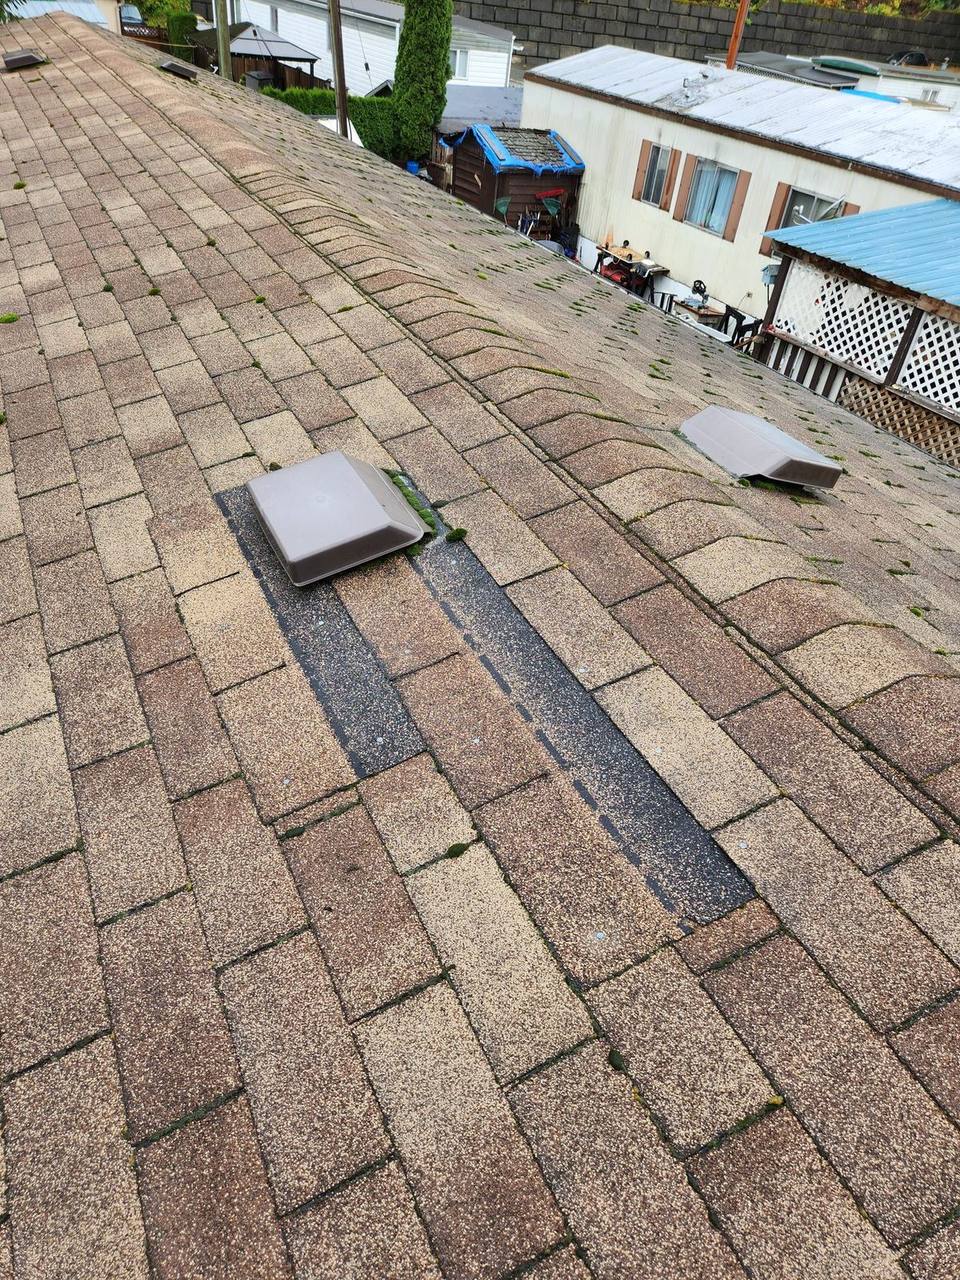
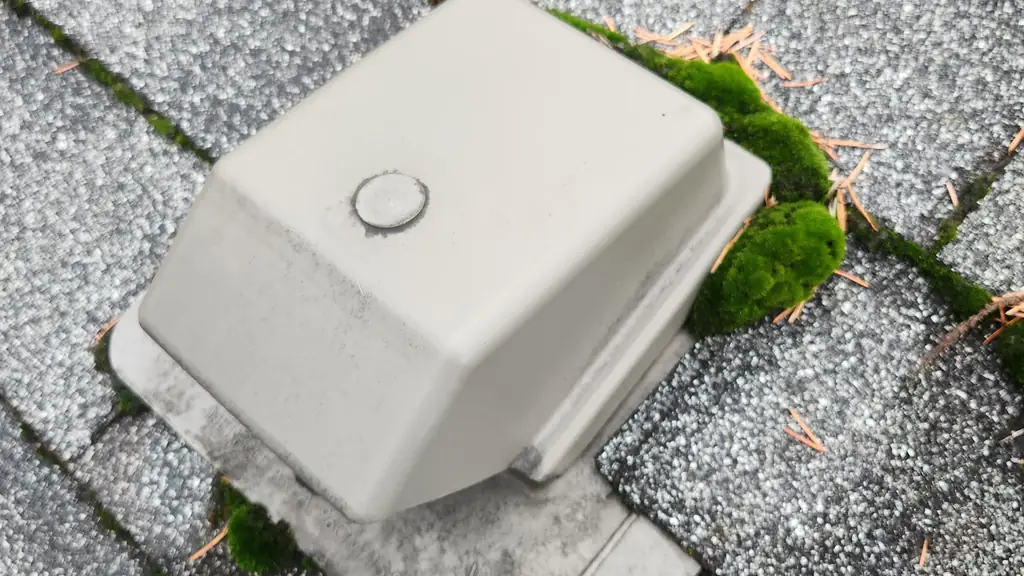
Every plumbing vent that exits your roof is sealed with a rubber boot. UV exposure degrades this rubber over 10-15 years, causing it to crack, split, and separate from the pipe. It's one of the simplest leaks to fix, but also one of the most frequently ignored until water damage appears on a bathroom ceiling.
- Warning signs: Visible cracks or splits in the rubber boot, gap between boot and pipe, water stains near vent location in attic
- Temporary fix: Roof sealant around the boot collar ($20-50)
- Permanent fix: Replace the entire vent boot assembly ($150-300 per vent)
4. Moss-Driven Shingle Lifting
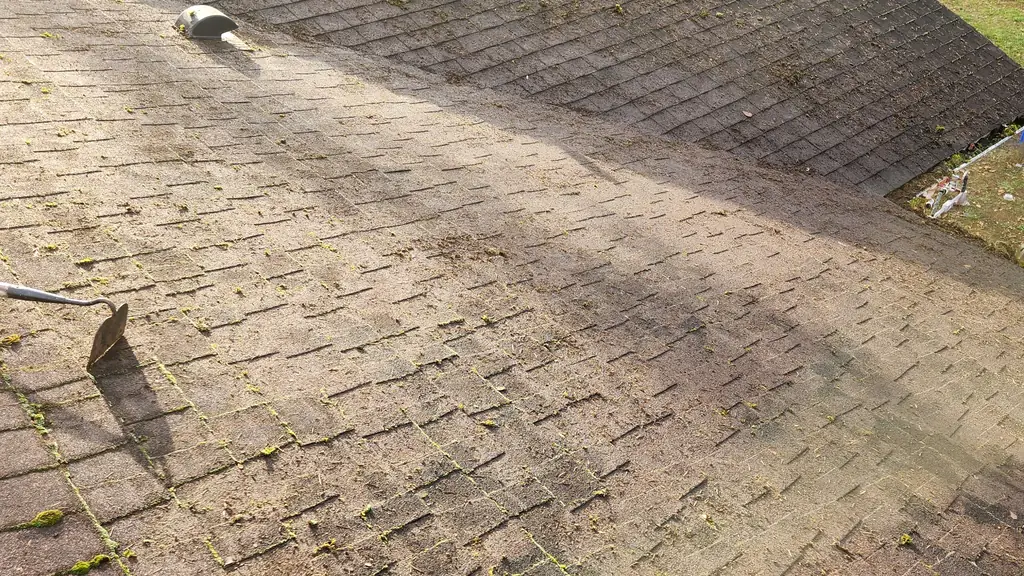
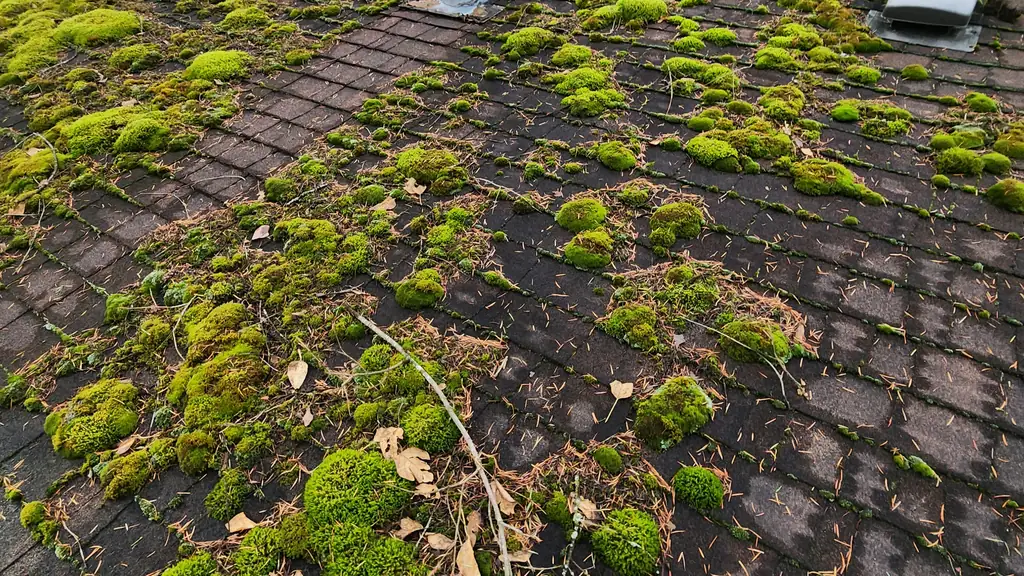
This is a Fraser Valley specialty. Our persistently damp climate, shaded north-facing slopes, and proximity to forested areas create ideal conditions for moss colonization. Moss doesn't just sit on your shingles, it actively roots into the granule surface, lifting tab edges and creating channels that direct rainwater underneath. We see moss-related leaks year-round in Agassiz, Harrison, Rosedale, and the hillside areas of Chilliwack.
- Warning signs: Thick green moss on north-facing slopes, shingle edges visibly lifted, granule loss under moss colonies
- Prevention: Annual zinc sulfate treatment and gentle hand removal (never pressure wash, it destroys granules)
- Repair: Remove moss, replace damaged shingles, install zinc strip along the ridge ($300-800 depending on roof size)
5. Skylight Leaks vs. Condensation
Not every skylight drip is a leak. In our humid climate, condensation on the underside of skylight glass is extremely common, especially in bathrooms and kitchens. The diagnostic test is simple: if it drips only during rain, it's a leak (flashing or seal failure). If it drips in cold weather regardless of rain, it's condensation.
- Condensation fix: Improve attic ventilation and add insulation around the skylight well
- Flashing leak fix: Re-seal or replace skylight flashing ($500-1,500)
- Cracked dome: Full skylight replacement ($800-2,500 installed)
6. Ice Dam Leaks (Eastern Fraser Valley)
Homes in Hope, Yale, and the higher-elevation areas around Agassiz and Harrison experience freeze-thaw cycles that create ice dams. When heat escaping through inadequate attic insulation melts snow on the upper roof, meltwater flows down to the cold eaves and refreezes, creating an ice barrier. Subsequent meltwater pools behind the dam and backs up under shingles.
- Warning signs: Icicles forming at eaves, visible ice buildup at roof edge, leaks that appear during or after snow melt
- Emergency fix: Carefully remove snow from the lower 3 feet of roof with a roof rake (from the ground, not on a ladder)
- Permanent fix: Increase attic insulation to R-50+, improve ventilation to 1:300 ratio, extend ice & water shield to 72 inches during next re-roof
Emergency Leak Response: What to Do Right Now
If water is actively dripping into your home during a storm, here's the step-by-step response we recommend to every Fraser Valley homeowner:
Inside the House
- Contain the water: place buckets, towels, and plastic sheeting to protect flooring and belongings
- Relieve ceiling pressure: if drywall is bulging or sagging, carefully puncture it with a screwdriver over a bucket to drain pooling water before the entire section collapses
- Move electronics and valuables away from the leak zone
- Document everything: take photos and video of both the leak and any damage for your insurance claim
- Turn off electricity to any affected areas if water is near light fixtures or outlets
Emergency Tarping (Do Not Climb a Wet Roof Yourself)
A properly installed roof tarp can protect your home for weeks or months until permanent repairs are completed. Professional emergency tarping costs $300-600 and involves covering the leak area plus 4 feet beyond in every direction, securing the tarp with 2x4 battens and sandbags (never nails through the tarp), and extending over the ridge when possible for maximum wind resistance.
Call Fraser Roofing at 604-728-0146 for emergency tarping. We respond to emergencies across the Fraser Valley from Hope to Abbotsford, including Agassiz, Chilliwack, Harrison, Mission, and Rosedale.
Permanent Repair Costs: Fraser Valley 2026 Pricing
These are the typical repair costs we quote for Fraser Valley homeowners in 2026. Every roof is different, but this gives you a realistic range:
Minor Repairs ($150-$500)
- Replace cracked vent boot: $150-300
- Replace 5-10 damaged shingles: $200-400
- Re-seal existing flashing: $100-300
- Moss removal and zinc strip installation: $300-500
Moderate Repairs ($500-$2,000)
- Valley flashing replacement: $500-1,500 per valley
- Chimney flashing replacement: $800-2,000
- Skylight re-flashing: $500-1,500
- Step flashing along a wall: $400-1,200
Major Repairs ($2,000+)
- Roof deck section replacement (water-damaged sheathing): $1,000-3,000
- Chimney cricket installation: $1,500-3,000
- Full skylight replacement with new flashing: $2,000-4,000
- Multiple leak sources requiring extensive tear-back: $3,000-7,000
DIY vs. Professional: When to Call for Help
Safe for DIY (If You're Comfortable on Roofs)
- Replacing a single missing or cracked shingle
- Applying roof sealant to a small flashing gap
- Re-sealing a vent boot with roofing cement
- Removing moss with a stiff brush (no pressure washer)
Call a Professional
- Any valley flashing work, high water volume demands precise installation
- Chimney flashing, requires counter-flashing set into mortar joints
- Skylight repairs, improper re-flashing creates worse leaks
- Multiple leaks appearing simultaneously, usually indicates a systemic issue
- Steep roofs (7:12 pitch or greater), fall hazard without proper equipment
- Two-story or higher, safety risk multiplies dramatically
- Any leak you've already tried to fix once, a misdiagnosed leak will return
Preventing Future Leaks: The Fraser Valley Maintenance Calendar
Spring (March-April)
- Full roof inspection after winter, check for storm damage, ice dam effects, and moss growth
- Apply zinc sulfate moss treatment before growing season
- Inspect attic for any new water stains from winter storms
Summer (June-August)
- Check vent boots for UV cracking (the dry season makes damage visible)
- Inspect and re-seal any flashing that shows sealant deterioration
- Trim branches within 6 feet of the roof surface
Fall (September-October)
- Pre-winter inspection, this is the most important one for Fraser Valley homes
- Replace any damaged shingles or deteriorated flashing before atmospheric river season
- Ensure attic ventilation is unobstructed (soffit vents clear of insulation)
Winter (November-February)
- Monitor attic during heavy rain events for new leaks
- Remove snow accumulation from eaves if ice dams form (Hope, Yale, eastern valley)
- After major storms, do a visual exterior check from the ground with binoculars
Insurance Claims for Roof Leak Damage
What Insurance Typically Covers
- Sudden storm damage: Wind-blown shingle loss, fallen trees, hail damage
- Resulting interior damage: Water-damaged drywall, flooring, and belongings from a covered event
- Emergency mitigation: Tarping costs to prevent further damage after a covered event
What Insurance Does NOT Cover
- Wear and tear: Gradual deterioration from aging materials
- Deferred maintenance: Leaks resulting from years of neglected upkeep
- Slow leaks: Damage that accumulated over months or years without being addressed
Filing a Claim Successfully
- Document all damage immediately with dated photos and video
- Perform emergency mitigation (tarping), your policy requires you to prevent further damage
- Contact your insurance company within 24-48 hours of discovering storm damage
- Get written repair estimates from licensed roofing contractors
- Be present during the adjuster's inspection to point out all damage areas
Fraser Roofing works regularly with insurance adjusters across the Fraser Valley. We provide detailed repair estimates with photos that insurance companies need to process claims efficiently.
Why Fraser Roofing for Leak Detection
Kory and Johnny Peters aren't just roofers, they're Red Seal Journeyman Boilermakers who spent years in Alberta's oil sands fabricating and inspecting pressure systems where a single leak could be catastrophic. That industrial precision carries directly into residential roofing: they trace water paths methodically, identify root causes (not just symptoms), and make repairs built to survive the Fraser Valley's relentless rain.
Since 2016, Fraser Roofing has served homeowners from Hope to Abbotsford and every community in between, Agassiz, Harrison Hot Springs, Chilliwack, Rosedale, Yale, and Mission. Ten years later, the approach hasn't changed: find the real problem, explain it honestly, fix it permanently.
Dealing with a roof leak? Don't wait for the damage to spread. Call Fraser Roofing at 604-728-0146 for a free leak inspection. We respond to emergencies across the Fraser Valley and provide honest, detailed estimates with no pressure.
Related Guides
Want someone to look at your roof?
Kory & Johnny have roofed homes across the Fraser Valley since 2016. Free inspections, honest estimates, no pressure.
604-728-0146Text UsEmailServing Hope, Agassiz, Chilliwack, Rosedale, Abbotsford & the entire Fraser Valley
Emergency leak? Call 604-728-0146. Fraser Roofing serves the Fraser Valley from Hope to Abbotsford
Frequently Asked Questions
How do professional roofers trace a leak source in the Fraser Valley's heavy rain?
At Fraser Roofing, we use a systematic three-stage approach perfected on ten years of Fraser Valley roofs. First, we inspect the attic during or immediately after rain, following water trails along rafters and sheathing back to the entry point, water often travels 5-10 feet from where it enters to where it drips. Second, we measure from fixed reference points (chimney, vent stack, ridge) to transfer the interior location to the roof exterior. Third, we inspect the corresponding exterior area for failed flashing, cracked vent boots, or damaged shingles. The Fraser Valley's 170+ cm annual rainfall actually helps detection, leaks that might be intermittent in drier climates show up consistently here.
Why do Fraser Valley roofs leak more often than roofs in drier parts of BC?
The Fraser Valley receives over 170 cm of rain annually, with atmospheric rivers delivering intense multi-day storms that test every seal, flashing joint, and shingle on your roof. This constant moisture accelerates galvanized flashing corrosion (valleys rust through 3-5 years sooner than in the Okanagan), promotes aggressive moss growth that wedges under shingle tabs, and creates freeze-thaw cycles in mountain communities like Hope and Yale that crack sealants. Homes in Agassiz, Chilliwack, and Harrison are also exposed to persistent valley fog that keeps surfaces damp for weeks, preventing proper drying between storms.
How much does roof leak repair cost in the Fraser Valley in 2026?
Fraser Valley roof leak repair costs in 2026 typically range from $150-$400 for minor fixes (vent boot replacement, small shingle repairs, flashing re-seal), $500-$2,000 for moderate repairs (valley flashing replacement, chimney flashing, skylight re-flashing), and $2,000-$5,000+ for major work requiring deck replacement or structural repairs. Fraser Roofing provides free leak inspections and honest estimates for homeowners across Hope, Agassiz, Chilliwack, Harrison, Abbotsford, and Mission. Call 604-728-0146 for a same-day assessment.
What emergency steps should I take when my roof starts leaking during a Fraser Valley storm?
During an active leak: 1) Place buckets and towels to contain water and protect flooring. 2) If the ceiling is bulging, carefully puncture it with a screwdriver to drain pooling water before the drywall collapses. 3) Move electronics and valuables away from the leak zone. 4) Document everything with photos and video for insurance. 5) Call Fraser Roofing at 604-728-0146 for emergency tarping, we serve the entire Fraser Valley from Hope to Abbotsford. Do NOT climb onto a wet roof during a storm. A professional emergency tarp installation costs $300-$600 and can protect your home for months until permanent repairs are scheduled.
Can moss on my roof actually cause leaks?
Yes, moss is one of the leading causes of premature roof leaks in the Fraser Valley. Moss roots grip the granule surface of asphalt shingles, gradually lifting tab edges and creating channels for water to penetrate underneath. In persistently damp areas like Agassiz, Harrison, and Rosedale, moss can establish within 2-3 years on north-facing slopes. Once moss lifts a shingle edge even 3-4mm, capillary action draws rainwater underneath during heavy storms. Fraser Roofing recommends annual moss treatment and gentle removal (never pressure washing, which destroys granules) as part of your roof maintenance plan.
$1,000 off applies to full roof replacements of 3,000 sq ft or more. Cannot be combined with other offers or previously placed orders. Not valid on partial jobs, repairs, or insurance claims.